I ran one photo of a brick townhouse through two photo-to-3D tools on the same day: Meshy 7.1 Flagship and SupaVoxel. The shape of the result is covered elsewhere in this series. This post is about the surface: whether you get a texture at all, how many pixels of it land on the building, and how close its colours sit to the real brick once you take lighting out of the picture.
The short version: Meshy's texture switch starts in the off position, and that one default decided most of the scores below.
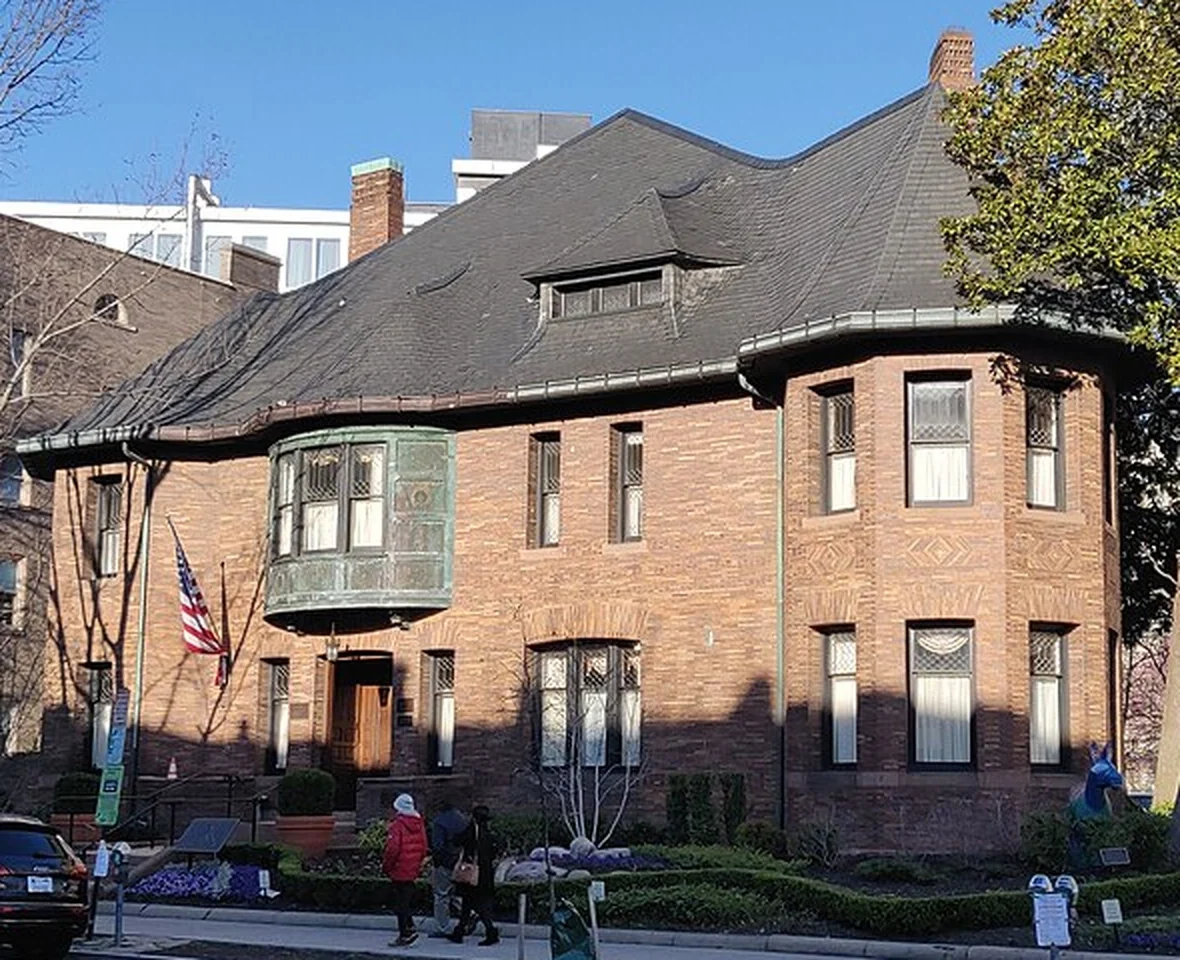 The single input photo for both tools. Watch the pale brick and the green copper bay; they are the two colour tests in this post.
Scorecard: Meshy 60/100, SupaVoxel 90/100
Eight dimensions, each scored out of ten, each tied to something I measured or saw in the exported file:
| Dimension | Meshy | SupaVoxel | What decided it |
|---|---|---|---|
| First-run honesty | 1 | 10 | Meshy's default run came back white, with no texture and no UV channel |
| Texture resolution | 2 | 10 | 12.6 Mpx shared with a street vs 50.3 Mpx on the building alone |
| Colour accuracy | 2 | 9 | Wall ΔE 29.7 vs 10.6 against the photo |
| Signature detail | 2 | 9 | The copper bay window: olive-black lump vs verdigris intact |
| Close-range texture | 3 | 9 | Mortar dissolves vs courses you can count |
| Cost per usable model | 3 | 10 | 35 credits (60 with the trap) vs 3 |
| Time estimates | 3 | 8 | Texture pass 4.5–10 min on a "2 min" quote vs 4 min 55 s on "5–10 min" |
| Texturing ceiling | 8 | 6 | Meshy's standalone texturing tool goes to 8K PBR |
The last row is Meshy's to keep. When you drive its dedicated texturing tool by hand, you get PBR maps at 2K, 4K or 8K. My problem is the default image-to-3D path, which is the one most people will actually click.
Run one: 25 credits for a white model
I uploaded the photo, left every setting as it was and pressed generate. The balance went from 1,100 to 1,075, and 74 seconds later I had a model with no colour on it.
 Meshy's upload screen. The generate button lists the credit cost up front, but nothing on it warns that the default run ships with no materials.
To be fair, Meshy shows the price before you commit, which plenty of tools don't. But the button reads "25 credits", not "25 credits, untextured", and nobody asking for image-to-3D expects a plaster-white model. I opened the GLB to be sure. It reports zero textures and no TEXCOORD_0 attribute. With no UV coordinates, the mesh has nowhere to put a texture, so you can't add one to this model later.
That matters for what comes next. Flipping the Texture switch on doesn't paint the model you already paid for. It starts a brand-new generation.
Run two: another 35 credits, and a different mesh
Run two cost 35 credits, billed as two separate charges: 25 for geometry and 10 for texture. The balance fell from 1,075 to 1,040. Geometry took about 58 seconds. The texture pass took between 4.5 and 10 minutes, against an on-screen estimate of two.
Because it regenerated from scratch, the textured model isn't the white model with paint on it. It's a new mesh of 6,056,056 triangles, while the untextured one had 2,046,180. So paying for texture changed the geometry as well.
On SupaVoxel the same photo took one upload, one button and one charge.
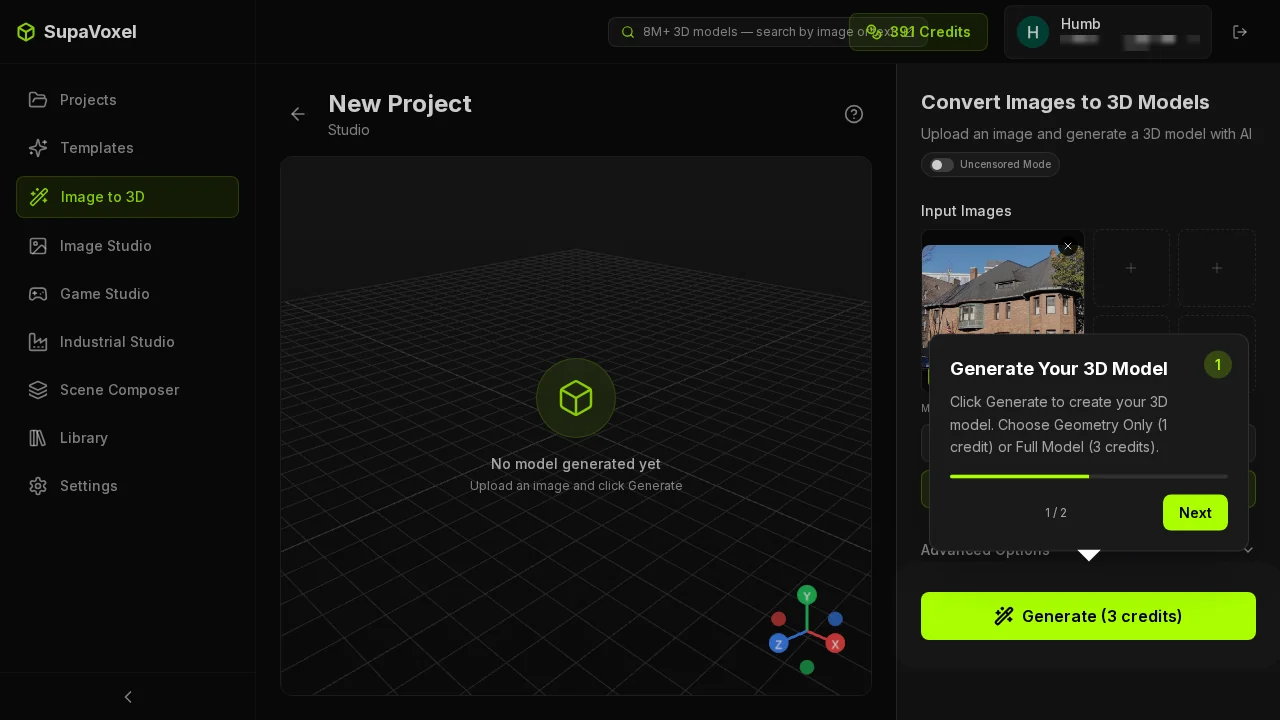 SupaVoxel's upload step. It costs 3 credits and the model comes back textured by default, with no second switch to find.
The balance there went from 391 to 388. The model arrived in 295 seconds, inside its "5–10 minutes" estimate, with three texture maps already attached.
Adding it up: 60 credits for my first usable Meshy model, 3 for SupaVoxel, a factor of 20. Even if you know about the switch and set it correctly the first time, it's 35 against 3, still about 11.7 times as many credits. Meshy's free plan gives 100 credits a month, so one missed checkbox uses up most of a free month.
Texture budget: 12.6 Mpx for a whole street
Raw resolution doesn't tell you much. What counts is how many texture pixels end up on the thing you wanted to model.
- Meshy wrote three 2048 × 2048 JPEG maps, 12.6 Mpx in total. It rebuilt the whole photograph as one mesh with one material, so that atlas also covers the tree, the parked car, two pedestrians and the pavement.
- SupaVoxel wrote three 4096 × 4096 WebP maps, 50.3 Mpx in total. It isolated the house on a base plate, so every one of those pixels is on the building.
That's four times the texture pixels, and in SupaVoxel's case none of them go to street furniture. You can see the difference as soon as the camera gets close to a wall.
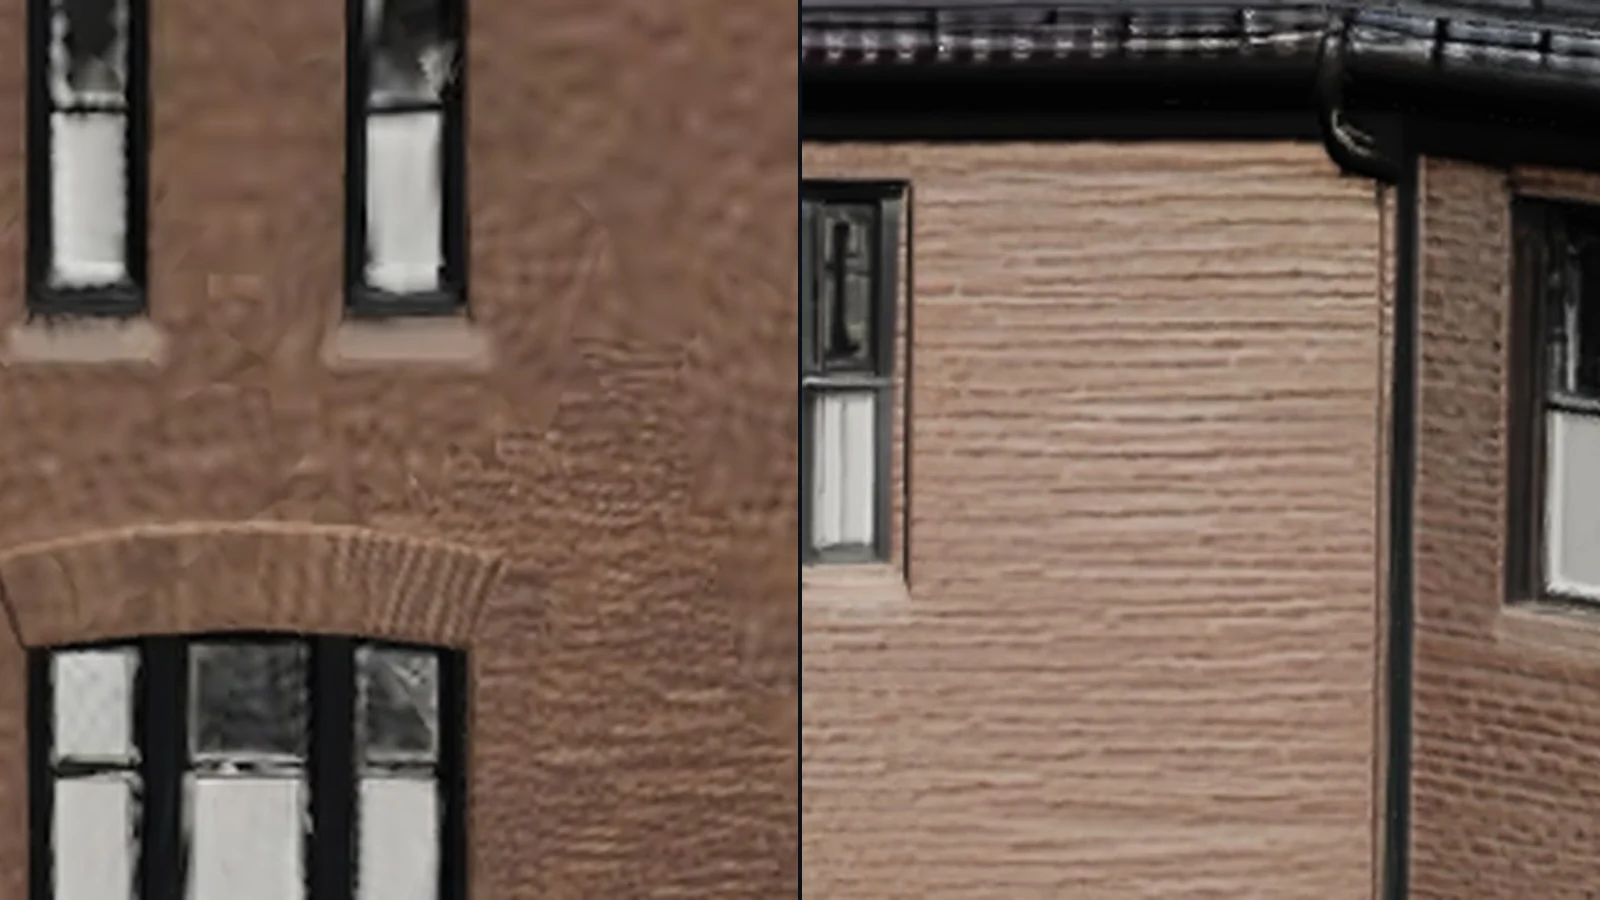
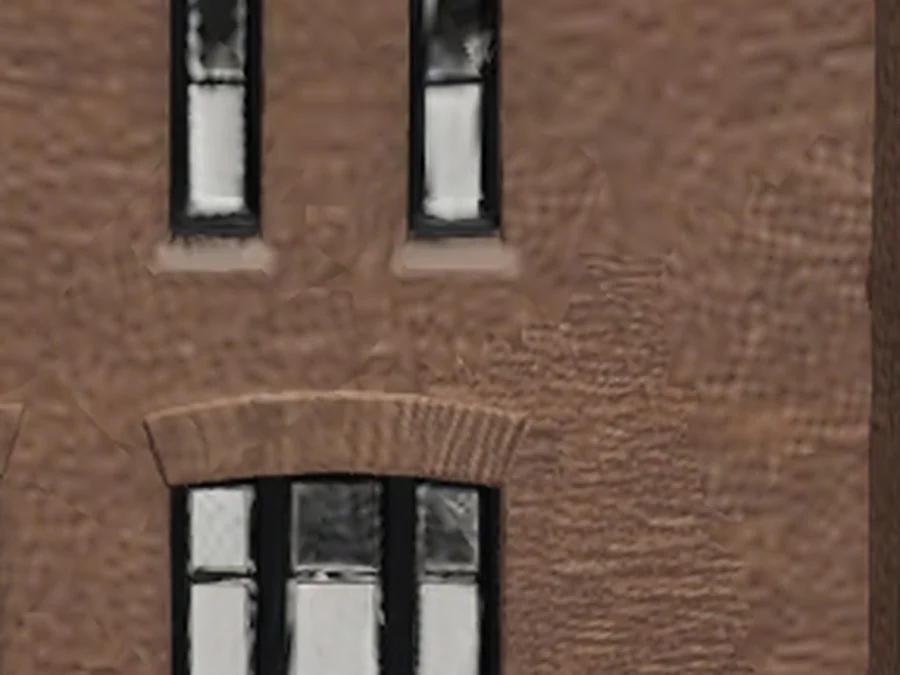 Meshy's brick at close range. The courses have melted into something like embossed leather, because 2048 px spread across a whole street leaves little room for mortar joints.
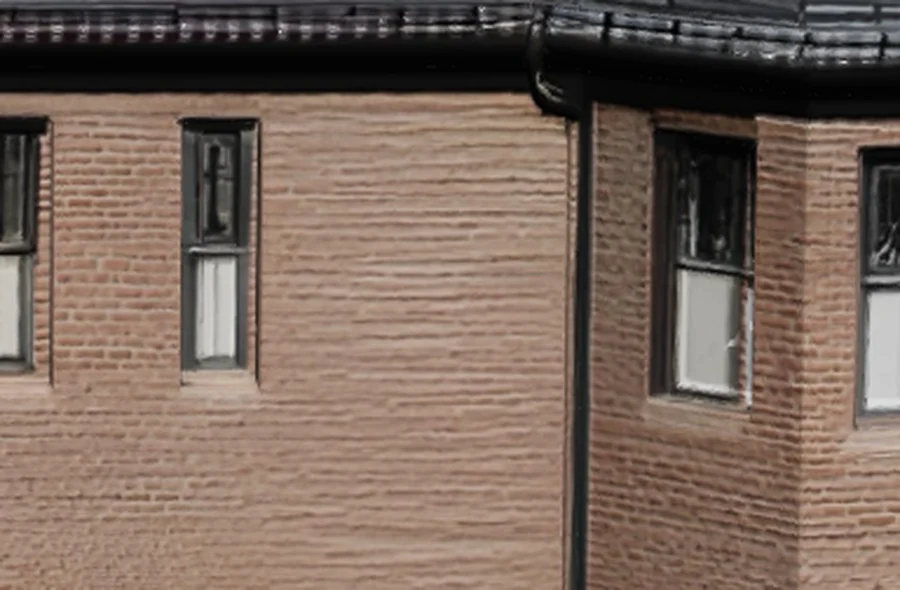 SupaVoxel from the identical camera position. You can still count the courses one by one.
Where did Meshy's pixels go? Look at the front of the building.
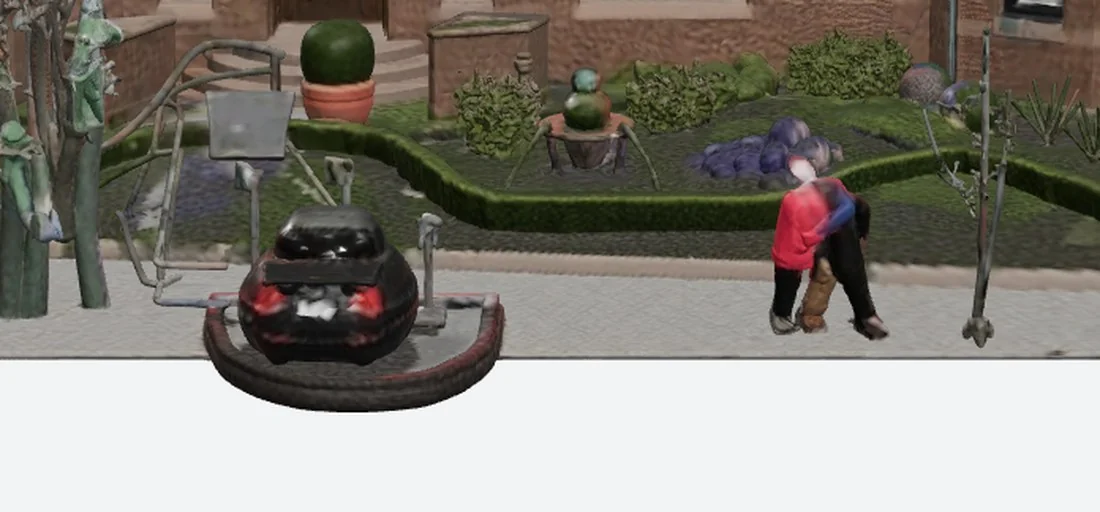 Every object in this crop took a share of Meshy's 12.6 Mpx atlas: a car slumped into a dark red beetle, two passers-by turned into coloured posts with white smudges for faces, a sign, a lamp post, dead branches and some purple blobs.
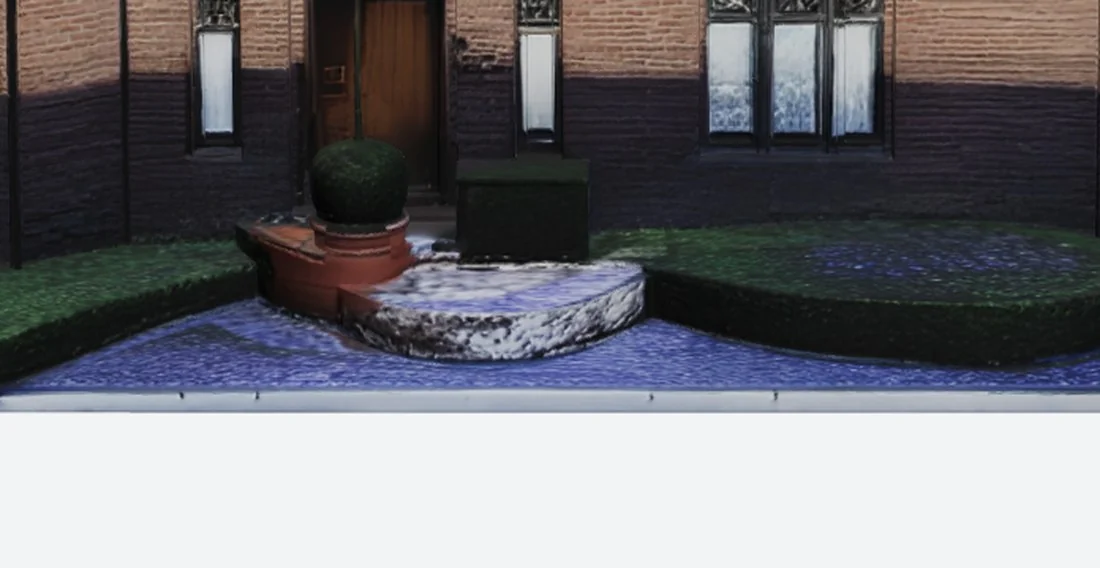 SupaVoxel dropped the car, the people, the sign and the pole, and kept the steps, planters and topiary that belong to the house.
The soft brick isn't really a weakness in Meshy's texture generator. It comes from a small atlas stretched over objects nobody asked for. The extra objects also cost you in the file, which I measured separately in the 185 MB vs 15.2 MB file-size breakdown.
Colour drift, measured with the lights off
Call a texture too dark and someone will blame your lighting, so I removed lighting from the test.
Both models went into the same three.js viewer in albedo mode: every material becomes an unlit basic material showing only the product's baked base-colour map. No lights, tone mapping, exposure or grading, so what's on screen is exactly the colour each tool wrote into its file.
Then I sampled the same stretch of wall on the photo and on both models, the same way each time:
- Keep only pixels where red > green > blue that are neither too dark nor blown out. That filters out glass, roof and sky and leaves brick.
- Take the median RGB of what's left, so a handful of odd pixels can't pull the result.
- Convert that median to CIE Lab and compute ΔE (CIE76) against the photo's median.
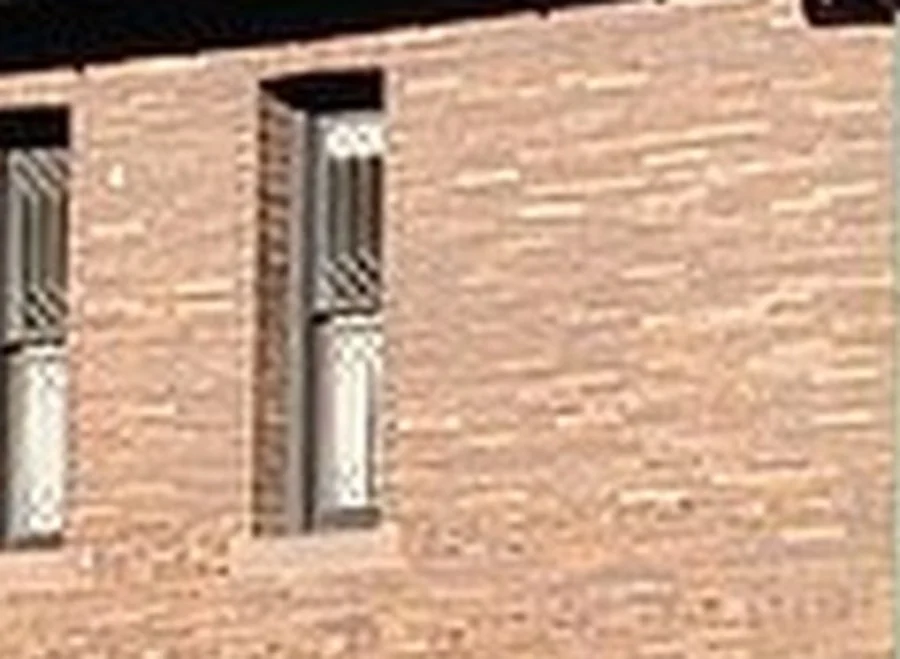 The reference patch from the source photo. Median colour #d5ad91: a pale salmon brick with clean mortar lines.
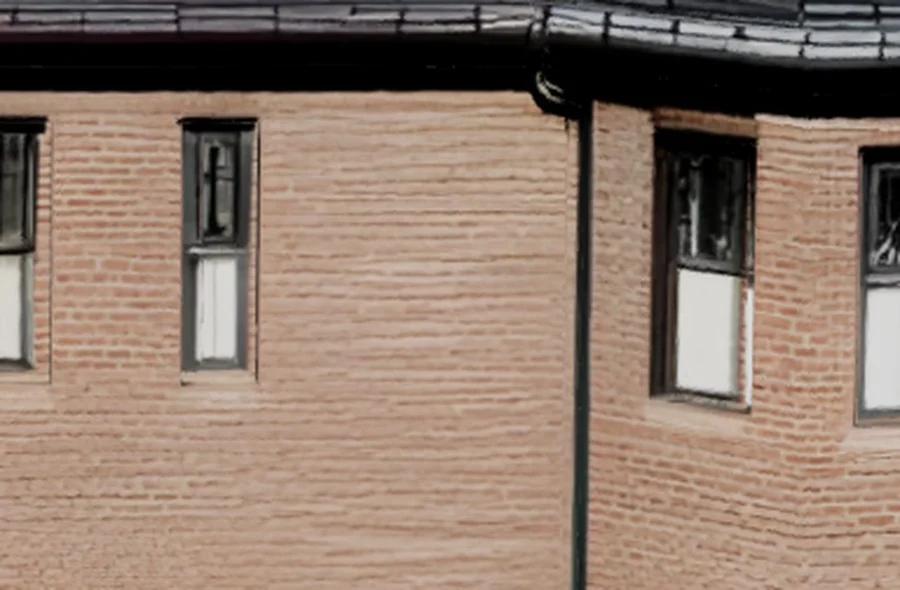 SupaVoxel's baked albedo, unlit. Median #b59783, the same brick family a shade darker, at ΔE 10.6.
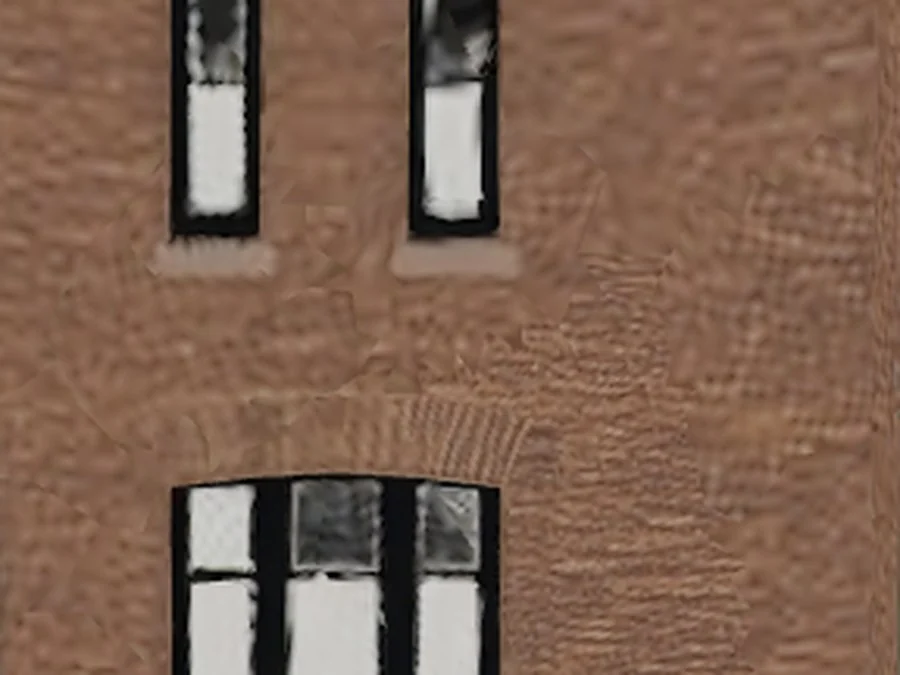 Meshy's baked albedo, unlit. Median #83614d, a chocolate brown with the mortar gone, at ΔE 29.7.
Here are the full readings side by side:
| Sample | Median RGB | Hex | L* | a* | b* | ΔL* | ΔE76 vs photo |
|---|---|---|---|---|---|---|---|
| Original photo | 213, 173, 145 | #d5ad91 | 73.6 | 10.6 | 19.9 | — | reference |
| SupaVoxel | 181, 151, 131 | #b59783 | 64.6 | 8.1 | 14.7 | −9.0 | 10.6 |
| Meshy | 131, 97, 77 | #83614d | 44.1 | 11.0 | 16.8 | −29.5 | 29.7 |
Both tools darken the wall, but in different ways. SupaVoxel loses 9 points of lightness and its hue barely moves. That's an overall dimming you'd hardly notice without the photo next to it. Meshy loses 29.5 points of lightness, about 40% of the original 73.6. A ΔE of about 2.3 is roughly where people start to notice a difference. At 10.6 you'd see the same brick on a greyer day. At 29.7, which is 2.8 times SupaVoxel's error, the wall looks like a different material.
The copper bay window
Most buildings have one feature that everyone points at. On this house it's the oxidised copper bay window, and it's the cleanest single-object colour test in the photo.
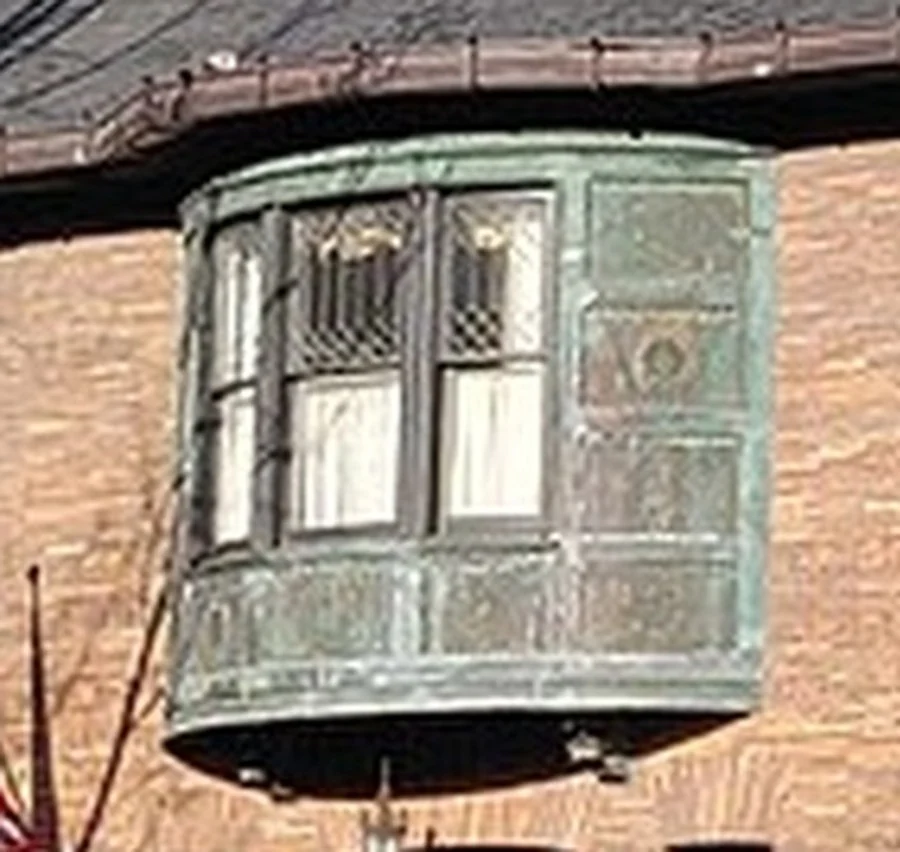 The original: green verdigris copper, vertical ribs and a row of square rosettes along the lower edge, with sharp brick on either side.
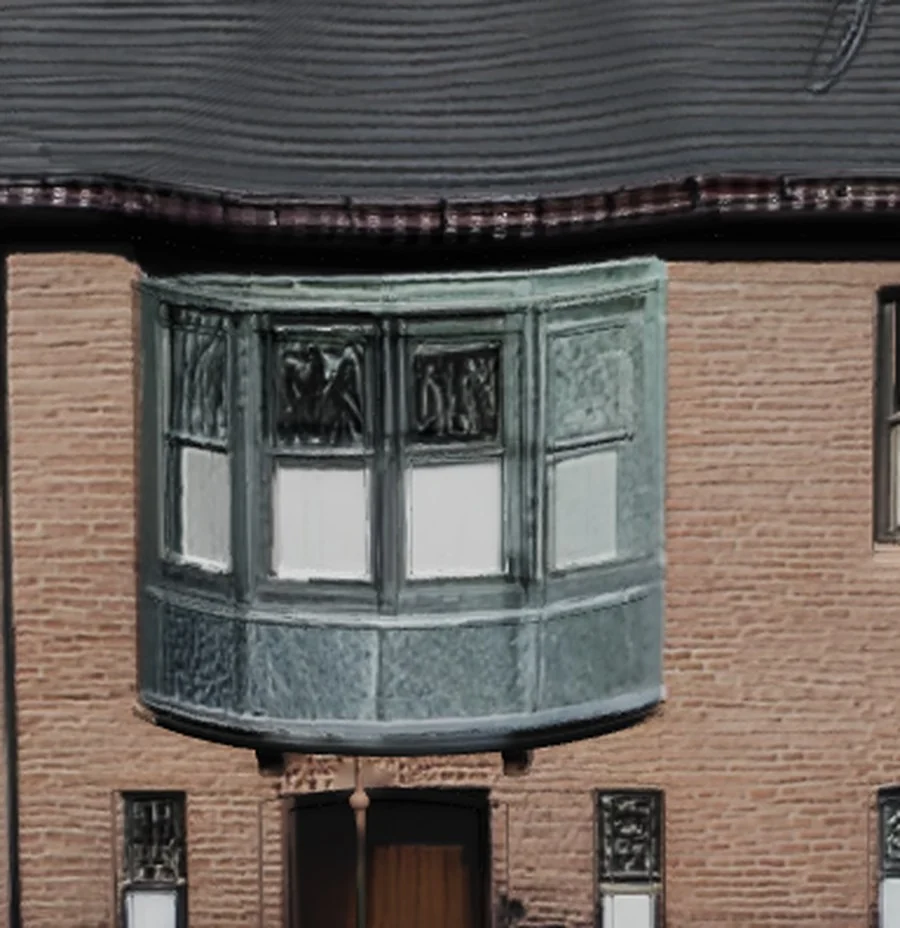 SupaVoxel keeps the verdigris colour, the ribs, the rosette band and the apron panel beneath the sill. The brick on both sides is still readable.
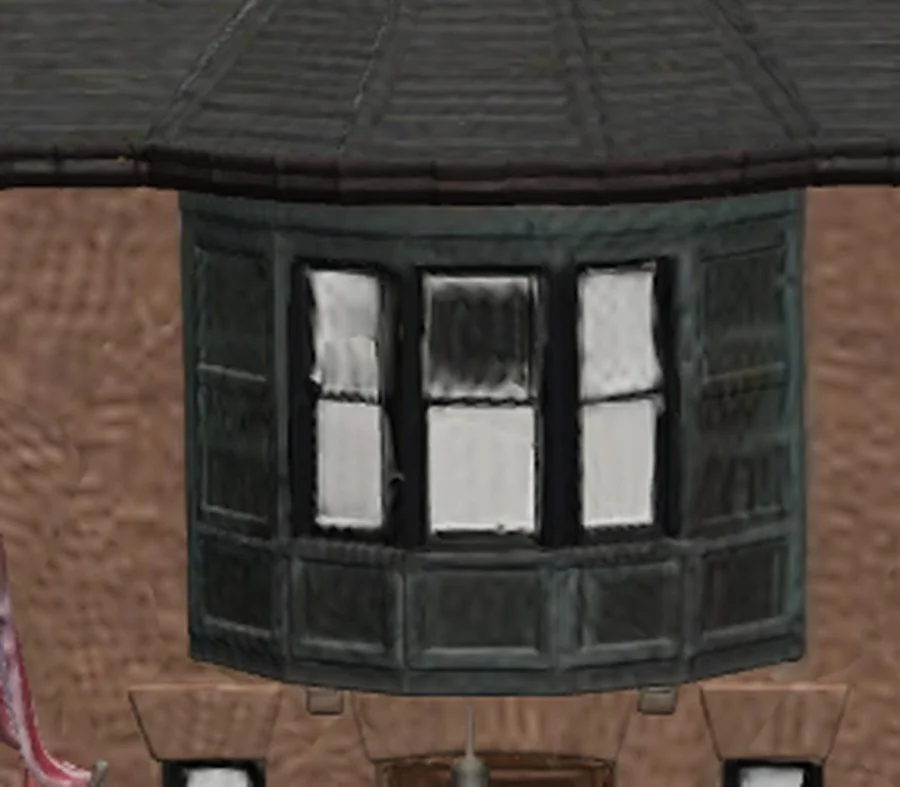 Meshy darkens the copper to a near-black olive, merges the rosettes into one raised lump and leaves the ribs as faint stripes. The mortar around it turns into lumpy render.
If you were going to render this building, this is where "export and render" becomes "repaint the copper and colour-correct the whole facade by hand".
Does texture even matter if you're 3D printing?
On this site the photo usually ends up as an STL on a print bed, so it's fair to ask whether any of the above matters. Both tools export print formats: Meshy offers STL and 3MF among eight formats, and SupaVoxel offers STL and 3MF alongside GLB, OBJ and USDZ. Whether texture matters depends on how you plan to print.
Single-colour FDM or resin: texture doesn't matter. An STL holds geometry and nothing else, so the slicer never sees the colour map. For a one-colour print, Meshy's untextured 25-credit run is really a geometry job. You still inherit the whole street, though, because the car, pedestrians and lamp post are part of the same mesh. SupaVoxel's model comes isolated on a base plate, which is close to what a printable house needs anyway.
Multi-colour printing: texture decides the result. Multi-material workflows take their colour from the model's surface colour. Once each region gets mapped to a filament, Meshy's #83614d wall will come out as a brown brick and its bay window as a dark olive rather than verdigris. You'd be printing the colour drift from the table above.
Painting a print by hand: the texture is your reference. If you print in grey and paint afterwards, the textured model is what you look at while mixing paint. A reference that's 29.5 points of lightness too dark, on a copper feature that has turned olive-black, will point you at the wrong colours. In that case the photo is a better reference than Meshy's model.
Previewing before you print: people judge the colour first. Whether it's a client checking a web preview or you deciding if the model deserves twelve hours of printer time, the textured model is what gets looked at. A brown house with a black bay window reads as a failed model even if the geometry underneath is fine.
The credit trap catches you either way. Suppose you only want a one-colour print and skip texture on purpose. The untextured run has no UV channel, so if you later decide you want colour for a preview or a multi-colour print, you can't add it to that model. You pay for a full regeneration and get a different 6,056,056-triangle mesh instead of the 2,046,180-triangle one you had checked. If you might want colour at any point, pay for it on the first run.
Where Meshy earns its points
This isn't a one-sided result, and the 60 includes some real strengths:
- On the part of the front facade the photo covers well, the texture detail is excellent. The leaded glazing and the carved diamond brick band both survive.
- The standalone texturing tool produces PBR maps at 2K, 4K or 8K. If you drive it by hand, the ceiling is higher than SupaVoxel's.
- Credit costs are shown before you commit, and the geometry pass is quick: 74 seconds on the first run and about 58 on the second.
- The untextured run is a decent massing model, as long as you know that's what you're buying.
Against that: texture off by default (60 credits for a first usable model), a 12.6 Mpx atlas shared with a car and two pedestrians, ΔE 29.7 on the main wall, a ruined copper bay, and a texture pass that ran 4.5 to 10 minutes on a two-minute estimate.
Pricing, per textured building
Meshy's plans as of September 2026: Free at $0 with 100 credits a month, Pro at $20 a month with 1,000, Premium at $40 with 3,000 and Ultra at $100 with 8,000. Annual billing saves about 20%. Credits reset every month, and free-plan downloads are CC BY 4.0 with a monthly download cap.
At 35 credits per textured building, or 60 if the default catches you, Pro covers 28 buildings a month and Free covers two. Twenty-eight buildings on SupaVoxel come to 84 credits. Its free tier is 3 models a day instead of a monthly credit pool, and its credits don't expire.
Verdict
Meshy 7.1 can texture well. It resolves fine detail anywhere the camera had a clear view, and its dedicated texturing tool goes up to 8K PBR. But the path most people will use charged me 25 credits for a white model, then spread 12.6 Mpx across a whole street, then baked the wall 29.5 L* darker than the photo and turned the copper bay window olive-black. That's a 60.
SupaVoxel scores 90 because it avoids each of those problems on the same photo. It charges 3 credits and textures by default. All 50.3 Mpx of its 4K maps go to the building, and the wall lands at ΔE 10.6 instead of 29.7. It has one trade-off: window panes are painted into the texture rather than modelled, so a very close-up render or a detailed print of the glazing needs a little manual geometry. That's much less work than repainting a whole facade.
For text-to-3D or an established DCC pipeline, Meshy is still a reasonable choice. To turn a photo of a real building into something you'll render, preview or print in colour, try SupaVoxel before you spend a month of Meshy credits. You can also check my numbers on your own model in an afternoon: export it, render it unlit, sample a wall and convert the median to Lab.
More from this building test
Same photo, same two tools, same day:
- The back of the building: what each tool invents where the photo can't see. Meshy's rear roof loses its dormer, the rear windows turn into smudges, and four times the triangles buy messier topology.
- 185 MB vs 15.2 MB: the file-size cost of each model. This covers compression, mobile download time and what each file costs to serve.