If you came looking for image to stl guidance, this article explains why a DAE to OBJ conversion can lose textures and how the DAE, OBJ, MTL, and image files must be packaged for materials to display correctly.
When a converted OBJ looks gray, the mesh is often fine and the image files simply never reached the converter. This guide explains how Collada stores texture references, how to supply the missing images, and how to keep the exported OBJ, MTL and PNG files working together.
The short version
- A DAE usually names texture images rather than storing the image data inside the
.daefile. - Give the DAE to OBJ converter the
.daeand its texture images together, or upload one zip containing the export folder. - Keep the resulting
.obj,.mtland PNG texture files in the same package and do not rename them casually. - If you only need to inspect the source, use a DAE viewer first. If the destination is a web page or game engine, GLB may be a better target than OBJ.
Why the OBJ turns gray
A Collada file can contain geometry, materials, scene hierarchy, skins and animation. Its texture images are handled differently. The .dae usually contains references such as an image filename or path, while the actual PNG, JPG or TGA remains in a nearby folder.
That means a DAE can open successfully even when its texture images are absent. The model still has geometry and may still have plain diffuse material colors, so the converter can display and export the shape. It cannot recreate an image it was never given.
OBJ uses a similar split-file arrangement. The .obj stores the mesh, UV coordinates, normals and groups. An accompanying .mtl stores material information, including the link to an image through map_Kd. The texture is still a separate file.
The important distinction is this:
- The DAE references an image by name or path.
- The converter needs access to the actual image file.
- The OBJ uses the MTL to point to the exported texture.
- The image must remain where the MTL expects to find it.
If the DAE opens as a plain gray model, that does not automatically mean the mesh is damaged. It may only mean the image references were supplied without the images.
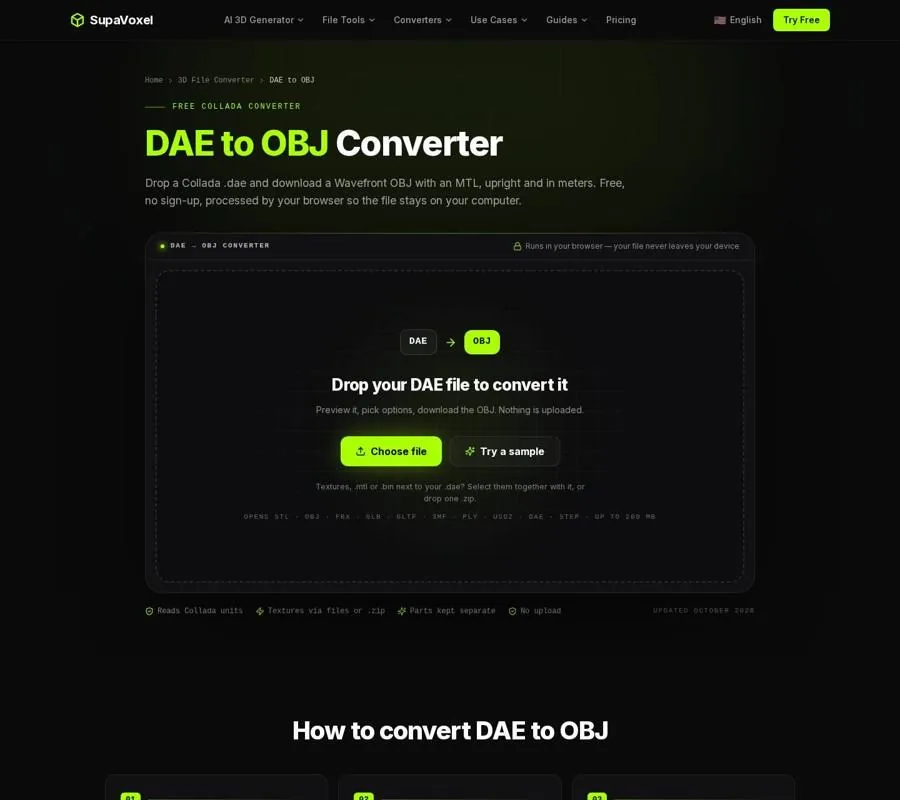
The converter accepts a Collada file and its texture assets before creating the OBJ package.
First, check what the DAE actually contains
Before converting, inspect the source folder rather than relying on the appearance of the model in another application. Look for the .dae and the image files exported beside it. A SketchUp export, for example, may place texture images in a folder next to the Collada file.
Do not assume that a material name means an image is embedded. A material can define a plain color, while another material points to an external image. The DAE may also refer to several images, not just one.
Useful checks include:
- Look for PNG, JPG or TGA files near the
.dae. - Compare image filenames with the names referenced by the export.
- Keep the original capitalization and spelling.
- Check whether the export included a texture folder.
- If the model came from a downloaded archive, extract the complete folder rather than selecting only the
.dae.
If you only have one .dae and no image files, the converter can still make an OBJ. It can preserve the geometry, UV coordinates and plain material colors, but missing images cannot be included in the result.
A browser inspection is useful before conversion. The DAE viewer opens a Collada file with its textures or as one zip, applies the declared unit and up axis, and shows material colors, meshes and other file information. It also opens a lone DAE with material colors when the image files are unavailable. That helps separate a texture problem from a geometry or orientation problem.

The viewer lets you check the source model and its materials before creating another format.
Supply the images in one of two ways
The reliable conversion methods are simple.
Method one: select the files together
Select the .dae and all of the texture images at the same time in the file picker. You can also drag the files onto the converter together.
This works best when the export folder is small and you know which images belong to the model. Include every image used by the scene, not only the image visible on the first object you inspect.
After the files are read, check the parts and materials panel. If an image was left out, the converter lists it in an amber note. That warning is useful: it tells you which referenced assets were not available instead of leaving you to discover the problem after opening the OBJ.
Method two: zip the export folder
If the DAE has many images or a texture subfolder, create one zip containing the .dae and the relevant texture files. Drop that zip into the converter.
This is usually the safer method for an exported project because it preserves the group of files as one transfer. It also avoids accidentally selecting the DAE while leaving its image folder behind.
A whole folder dragged directly into the page is not the same as a zip. Select the individual files or compress the folder first.
Convert with materials and textures enabled
Once the DAE and images are available, confirm that the converter has recognized the materials. Then leave Include materials & textures enabled and press Convert to OBJ.
The conversion keeps the model's UV coordinates and normals. Plain diffuse colors are written into the MTL, while supplied texture images are written as PNG files and linked through map_Kd. Geometry instances remain separate objects, so the result can contain distinct walls, windows, furniture or other parts rather than one undifferentiated mesh.
The output is a group of related files:
.obj— mesh geometry, UV coordinates, normals and object groups.mtl— material definitions and links to texture images.png— converted texture images used by those materials
A missing image may be reported while the conversion still completes. Treat that warning as an incomplete asset package, not as a harmless message. The mesh may open, but surfaces that depended on omitted images will not display their intended appearance.
Keep the exported files together
The most common post-conversion mistake is separating the OBJ from its support files. An OBJ does not generally contain the MTL or texture image data inside the geometry file. The OBJ needs to find the MTL, and the MTL needs to find the PNG files.
Keep the downloaded files together in one folder or preserve the downloaded zip as a unit. When opening the model in another program, select the .obj from that folder rather than copying only the mesh to a different location.
If you must reorganize the files, preserve the references:
- Keep the
.mtlbeside the.obj, unless the OBJ's material reference is updated. - Keep the PNGs where the MTL expects them.
- Avoid changing image filenames after conversion.
- Do not rename the MTL without checking the material reference in the OBJ.
- If an application asks for the MTL manually, choose the MTL created with that OBJ.
A gray result after a successful conversion often comes from moving one of these files, changing a filename, or opening the OBJ without its MTL. Reopen the original downloaded package before repeating the conversion.
When OBJ is not the best destination
OBJ is a practical choice for editing because many modeling and rendering applications read its geometry, UVs, groups and MTL materials. It is also useful when separate objects need to remain accessible.
For web, augmented reality and modern game-engine delivery, GLB may fit the job better. The DAE to GLB converter packs supplied PNG, JPG or TGA images into the GLB and keeps animation clips. It also preserves node hierarchy and transforms while writing the result in meters and the required Y-up convention.
That avoids the separate OBJ, MTL and image-file arrangement, but the same input rule still applies: the DAE's external images must be supplied. A GLB cannot pack texture files that were never provided.
For 3D printing, images are not part of the final result. STL stores triangles only, so materials, colors and textures are dropped. The DAE to STL converter is intended for creating a millimeter mesh, with the Collada unit and up axis applied before export. Use OBJ or GLB when the surface appearance matters; use STL when the goal is geometry for a slicer.
A repeatable troubleshooting workflow
When textures disappear, I use this order:
- Open the original DAE with its complete export folder.
- Check whether the model uses image textures or only plain material colors.
- Inspect the DAE and note any missing-texture warning.
- Select the
.daeand every referenced image together, or zip the folder. - Convert with Include materials & textures enabled.
- Open the resulting OBJ from the folder containing its MTL and PNG files.
- If the model is still gray, check the MTL and image filenames before changing the geometry.
This process avoids treating a missing asset as a mesh failure. It also gives a clear answer when the source export itself is incomplete.
FAQ
Does a DAE contain its texture images?
Usually, the DAE contains references to image filenames or paths rather than the image data. Supply the PNG, JPG or TGA files alongside the DAE, or provide one zip containing the export folder.
Why does the OBJ open but show no textures?
The OBJ may have loaded without its MTL or without the PNG files referenced by the MTL. Keep the OBJ, MTL and PNGs together, and do not change their names unless the references are updated.
Can I convert a DAE with no texture files?
Yes. The geometry can still be converted, and plain material colors can remain. The images themselves cannot be recovered from a DAE that only references files you do not have.